-
Things I Use: Nikon 85mm f/1.4G
So the 24/1.4 I mentioned picking up in my earlier post was not actually the end of the insanity for me during 2012; in November, I also purchased the Nikon 85mm f/1.4G fast prime. Truth be told, this was the last lens I was even remotely thinking about – I ceased even perusing what people were selling on craigslist after picking it up, as getting any more equipment at this point would be a total waste (if I wasn’t already squarely into that territory). Indeed, even the 85/1.4 was pretty excessive considering I already had the older but fully functional 85/1.8 AF lens. But after months of waiting for someone to offer the lens on craigslist, I actually finally bought it new from 42nd Street Photo when they had a promo for ~10% off. That might not seem like a huge discount, but Nikon strictly controls retail pricing across all sellers so things are very rarely available below regular Nikon-mandated prices. Also, used prices are often only ~20% below new prices, so any Craigslist seller would probably ask for pretty close to what I paid ($1495) in any case.

I’ve just had the 85/1.4 for a couple of months, so I have less experience and fewer examples than with the 24/1.4, but I’m using this lens a lot too. So far, over 90% of the shots I’ve taken have been at f/2.8 or wider; almost 40% were wide open at f/1.4. I don’t actually have too many examples I can share, since many of friends kids at birthdays and the like that I ought not to post here, though Olivia’s always got a face or two to show:

The above highlights an important difference between this lens and the 24/1.4, which is that depth of field is super shallow (Olivia’s eyes are in focus, but her lips aren’t, and even without clicking for the larger image it’s easy to see that the hair around her shoulders is totally blurred). Still, it was nice to get that shot at ISO 900 – instead of ISO 3600 with an equally expensive f/2.8 zoom, or at ISO 12800 with a kit lens! And true to what was claimed about the lens, it is consistently great at blurring the background in a pleasing way. This is even true when the background is pretty close, like with this picture of Leo:

Many lenses do OK, even at smaller apertures, when the background is far away (like in the first shot), but in this case, what you see behind Leo is actually the bench seat and wall he was sitting against (he was leaning forward over the table a little). Both of these pictures are just casual snapshots, but it is really nice to be able to have backgrounds just fade away like that.
One final example is a total miss on focus, exacerbated by Olivia moving a little too fast for the shutter speed I’d set (1/160th); I really wish I’d gone to 1/500th and taken the ISO penalty. Still, she looks semi-pro – if you ignore that this is badminton, not tennis; if you ignore that she completely and totally missed the bird; and if you ignore how she’s holding the racket. For reference, she totally can’t connect with a badminton bird yet :).

-
Things I Use: Nikon 24mm f/1.4G
It wasn’t that long ago – 21 months, to be exact – that I joked that Nikon’s updated prime lenses seemed to be for people who were made of money. But as I mentioned when starting to blog at all, one of the great things about it is having to look back and eat my words or laugh at my own foolishness. I just thought it’d take closer to a decade for that to happen, but it looks like I’ve already reached that point.
If you’ve followed what I’ve posted here the last couple of years, you’ll already have noted that I’ve some hypocritically moved from having amateur skills and decent but amateur equipment, to having amateur skills and professional level gear. What led to this? No, I didn’t glance down and realize that I was actually made of money and that I could thus lose weight by spending it (though that would be nice). In large part, it was the realization (such as with selling my 10-24 ultra-wide lens) that lenses really are a capital investment, and that even buying new you don’t lose that money. A related factor was buying everything used in the first place off of craigslist. Finally, living in the U.S. has the double benefit of lower taxes and a much wider range of highly competitive online merchants.
So, in July of last year, when a 24/1.4 showed up on craigslist (a relatively rare occurrence) at a good price, I did what I thought I’d never do and bought one:

Did I really need this lens? Definitely not – it’s overkill for a non-photographer, especially since I already had the fantastic 24-70 f/2.8 zoom lens that has awesome image quality and is just a couple of stops slower. That said, the 24/1.4 has quickly become one of my most used lenses, in large part because going to f/1.4 or even to f/2.0 really crosses that threshold of being able to take low light shots with no flash at reasonable shutter speeds – especially in combination with a full frame camera. Indeed, 36% of the shots I’ve kept from this lens have been at f/2.0 or wider; that increases to 42% if I exclude one batch of 100 photos at my cousin’s wedding tea ceremony (which were all taken at f/5.6 with a flash).
Here’s one example, of my friend Ahmad holding his young daughter:

Even at a relatively slow 1/80th of a second, the above was already at ISO 800 even at f/1.4. Even a big f/2.8 zoom would have pushed things up to ISO 3200; a kit lens would have cost another stop beyond that. Of course, conditions get much more extreme than that – for example, the following from my cousin Mike & Jackie’s wedding this past summer:

While I did play with the color, the shot itself was outside, hand-held, close to midnight, at a 1/40th shutter speed and ISO 6400 (the highest native ISO that the D800 supports). With a slower lens, I’d simply have needed a tripod – and I never take one with me, so I wouldn’t even try and take things like the above. Finally, here’s one of Olivia, with identical settings to the above:

Twice a week (on “no dessert” days), at bedtime, Olivia’s allowed to read a book herself on the tablet instead of reading a paper book with me – and when I say “read”, what I’m actually talking about the “Read To Me” mode of Dr. Seuss books on Android that read the story while highlighting the words. The only source of light above is what’s coming from my Nexus 7 – which is already on the lowest possible brightness settings since there’s zero ambient light. It’s no lie to say that the camera sees much better in the dark than I do.
So far, I just talked about how amazing it is to have an f/1.4 lens to shoot with; you could do much of the above with a vastly cheaper 50/1.4, unless you really did need to be wide (which sometimes you do). The 28/1.8 which is also 1/3rd the price is pretty darn close too (and I almost went with that option). But between truly getting wide, having an amazing close-focus distance, great AF in general, and really nice (for a wide prime) bokeh, I’ve been really happy with the the lens. As a final example, here was a quick test shot in the garden soon after I got the lens:

While that’s not the best bokeh example by any stretch, for a 24mm focal length I thought it was pretty decent. But even more impressive, and the main reason for using this photo as an example, is how darned close I actually was to the bee – remember that this is equivalent to a 16mm lens on a crop camera! A crop from the above might provide a better idea:

It feels totally absurd to live at a time when you can stick a very wide angle lens on a camera, shove it right in the face of a bee, depend on auto-focus to get everything right – and get something with the detail of the above, but hey, I’m not complaining!
Ultimately, you have to be pretty crazy to get a lens like this for casual snapshots in the middle of the night with only a tablet as a light source, but I’ve used it more than anything else I own since buying it. And it helps when I tell myself that I can probably sell it for pretty much what I paid for it – even after I get a few thousand shots with it!
-
Some new(ish) things I use
I have completely neglected posting anything for 3 months – and it’s now hours away from 2013! Perhaps it just didn’t seem worthwhile with the supposed end of the world upon us, but with that excuse out of the way, I guess I should stop procrastinating. In fact, there’s a whole set of things I’d meant to share that have collected in open tabs and the like, but I’ve been really busy and never got to any of it. I’ll try and start working through the queue with an update to the list of Things I Use – this time, for audio. I didn’t take the pictures for any of these, images are from the product makers!
Google Nexus Q
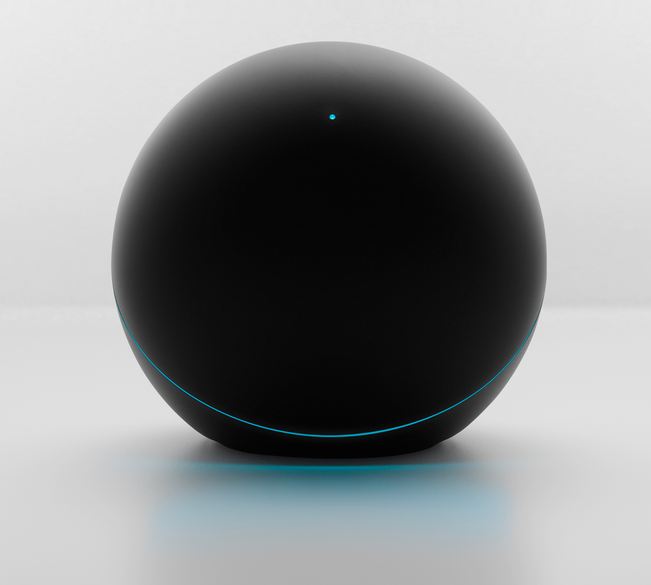
I was fortunate enough to get to try the Nexus Q shortly before it was introduced at Google I/O (and to keep it afterwards). While there was much debate of the Q vs. other video streaming boxes, I have to say that as an audio-only device it does quite well at filing a fairly particular niche.
For many years, I struggled to find an effective way to stream music to stereo speakers at high quality within my home, so that I wouldn’t have to actually find a physical CD to hear something. I wasn’t so concerned with online music streaming, because Canada had no viable services that you could actually sign up for (and when I started this pursuit, back around 2002, none existed anywhere). Storage, even with lossless compression, was a non-issue even a decade ago. I just wanted a CD player replacement.
My first attempt involved building something myself. Using a mini-ITX PC, a PCI Soundblaster card with a digital audio out (to a DAC), a fanless case and power supply, and a stripped down Linux configured to boot from LAN, I was able to get something up and running. It took a ton of effort – I had to tweak and compile drivers for the Soundblaster due to the lack of standard glibc in that micro-Linux distribution! It’s funny looking back, because I’m far too lazy today to do something like this. Unfortunately, sound quality was terrible, even with a high quality external D/A converter, because the Soundblaster resampled everything to a fixed 48kHz output rate. All my 44.1kHz sampled music (from CD) was being put through this process, and didn’t sound like the original CD. This was improved by forcing the music player to do its own 48kHz resampling with a better algorithm, but still, with no remote control, the system really wasn’t too usable, and I barely made use of it.
Next, I was probably one of the only owners of the optional Playstation 2 Ethernet accessory, which I think cost somewhere around $100, and which I used exclusively for media streaming. The PS2 had good connectivity into my A/V system at the time, so this had promise. I used the QCast Tuner software for media streaming, and it worked OK but was intermittent in terms of reliability. And I still needed to go stick the QCast Tuner disk into my PS2 and boot it up to play anything, which was actually slower than finding a CD, so I never really used this much either.
Finally, in 2005, along came the Squeezebox 3. At $299 without Wi-Fi for something that played music only, it was a little pricey, even at the time – but it was a great device that I use actively even today. It has great usability, a nice onboard DAC, plays music in almost any format, and even does true lossless audio – a DTS-encoded 5.1 audio stream encoded into the 1.5Mbit/s audio format used on CD plays back flawlessly, in surround sound. It’s analog audio outputs can be configured, if desired, to be volume controlled in order to directly drive a power amp. It was what I’d tried twice to come up with, but in a form factor that actually worked.
The Nexus Q delivers something similar, and improves in some areas by integrating an amp that can drive speakers directly. I was pretty skeptical about the power and quality of an amp that would fit inside the sphere, but was impressed when I actually tested things. It drove my Axiom M2 v2’s higher than I’d practically need before there was notable distortion (though you could definitely tell when you hit that point), and worked even better when paired with an old pair of Infinity Compositions Overture 2’s; those speakers have built-in powered subwoofers and seem to be the perfect companion for the Q. A bonus to getting rid of the external amp is that you can just play things at any time without powering the amp on or off (the Squeezebox didn’t have 12v triggers for this). Controlling playback entirely via an Android phone was something I was already doing with my Squeezeboxes, and it’s far better than traditional remotes.
Some bemoaned the lack of integration with other services like Spotify and Pandora, but as my goal was listening to music I own which was easily uploaded to Google Play, this wasn’t an issue for me. The lack of pre-amp outs mean I can’t connect the Q into bigger speakers, like my old Magnepan MG-IIIs, and when paired my with Axioms, there was no easy way to connect my subwoofer. Still, for certain room & speaker configurations, the Q as shown at I/O was a good alternative to something pricier like a Sonos.
Emotiva USP-1
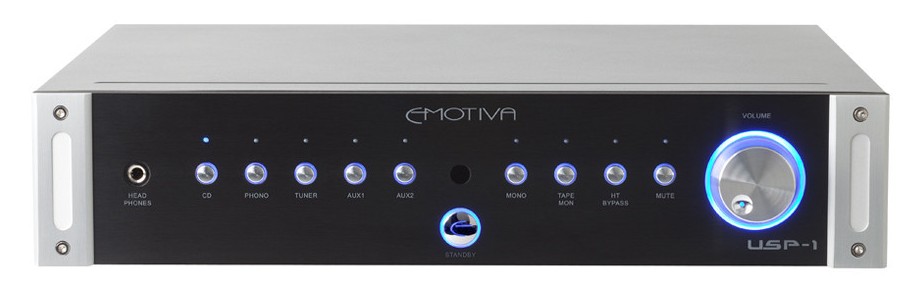
For quite some time, I’d just directly connected my Squeezebox into my power amp. There are a couple of drawbacks to this setup. The most obvious is that if you want to use anything else as a source of audio – like a CD/DVD/Blu-Ray player- you can’t. The second, which I only learned of a little later, is that volume is applied via digital attenuation. But even with a perfect DAC, if you’re using this approach with a 16-bit input signal (which is what CDs are encoded at) and have a 24-bit DAC, you can only chop off 8 bits before you’re killing off useful bits to lower volume. 8 bits is roughly -24dB of attenuation, and I’m often below that volume level.
The main reason I’d started connecting things directly is because I’d lost two previous pre-amps; a re-purposed Sony TA-E9000ES that died, and a true analog pre-amp (with no remote) that had become persistently flaky in one channel. So when Emotiva did their summer sale this year, I picked up the USP-1. I quite liked the UPA-2 2-channel amp I purchased a year earlier, and Emotiva’s overall philosophy of good build quality, reasonable prices, low marketing/distribution costs appeal to me.
Without having done meaningful tests of the USP-1 versus other preamps in an identical configuration, I can’t say much about its performance, other than to note that it sounds perfectly adequate and at least as good as the direction connection approach without either of the drawbacks I mentioned above.
Audioengine D1
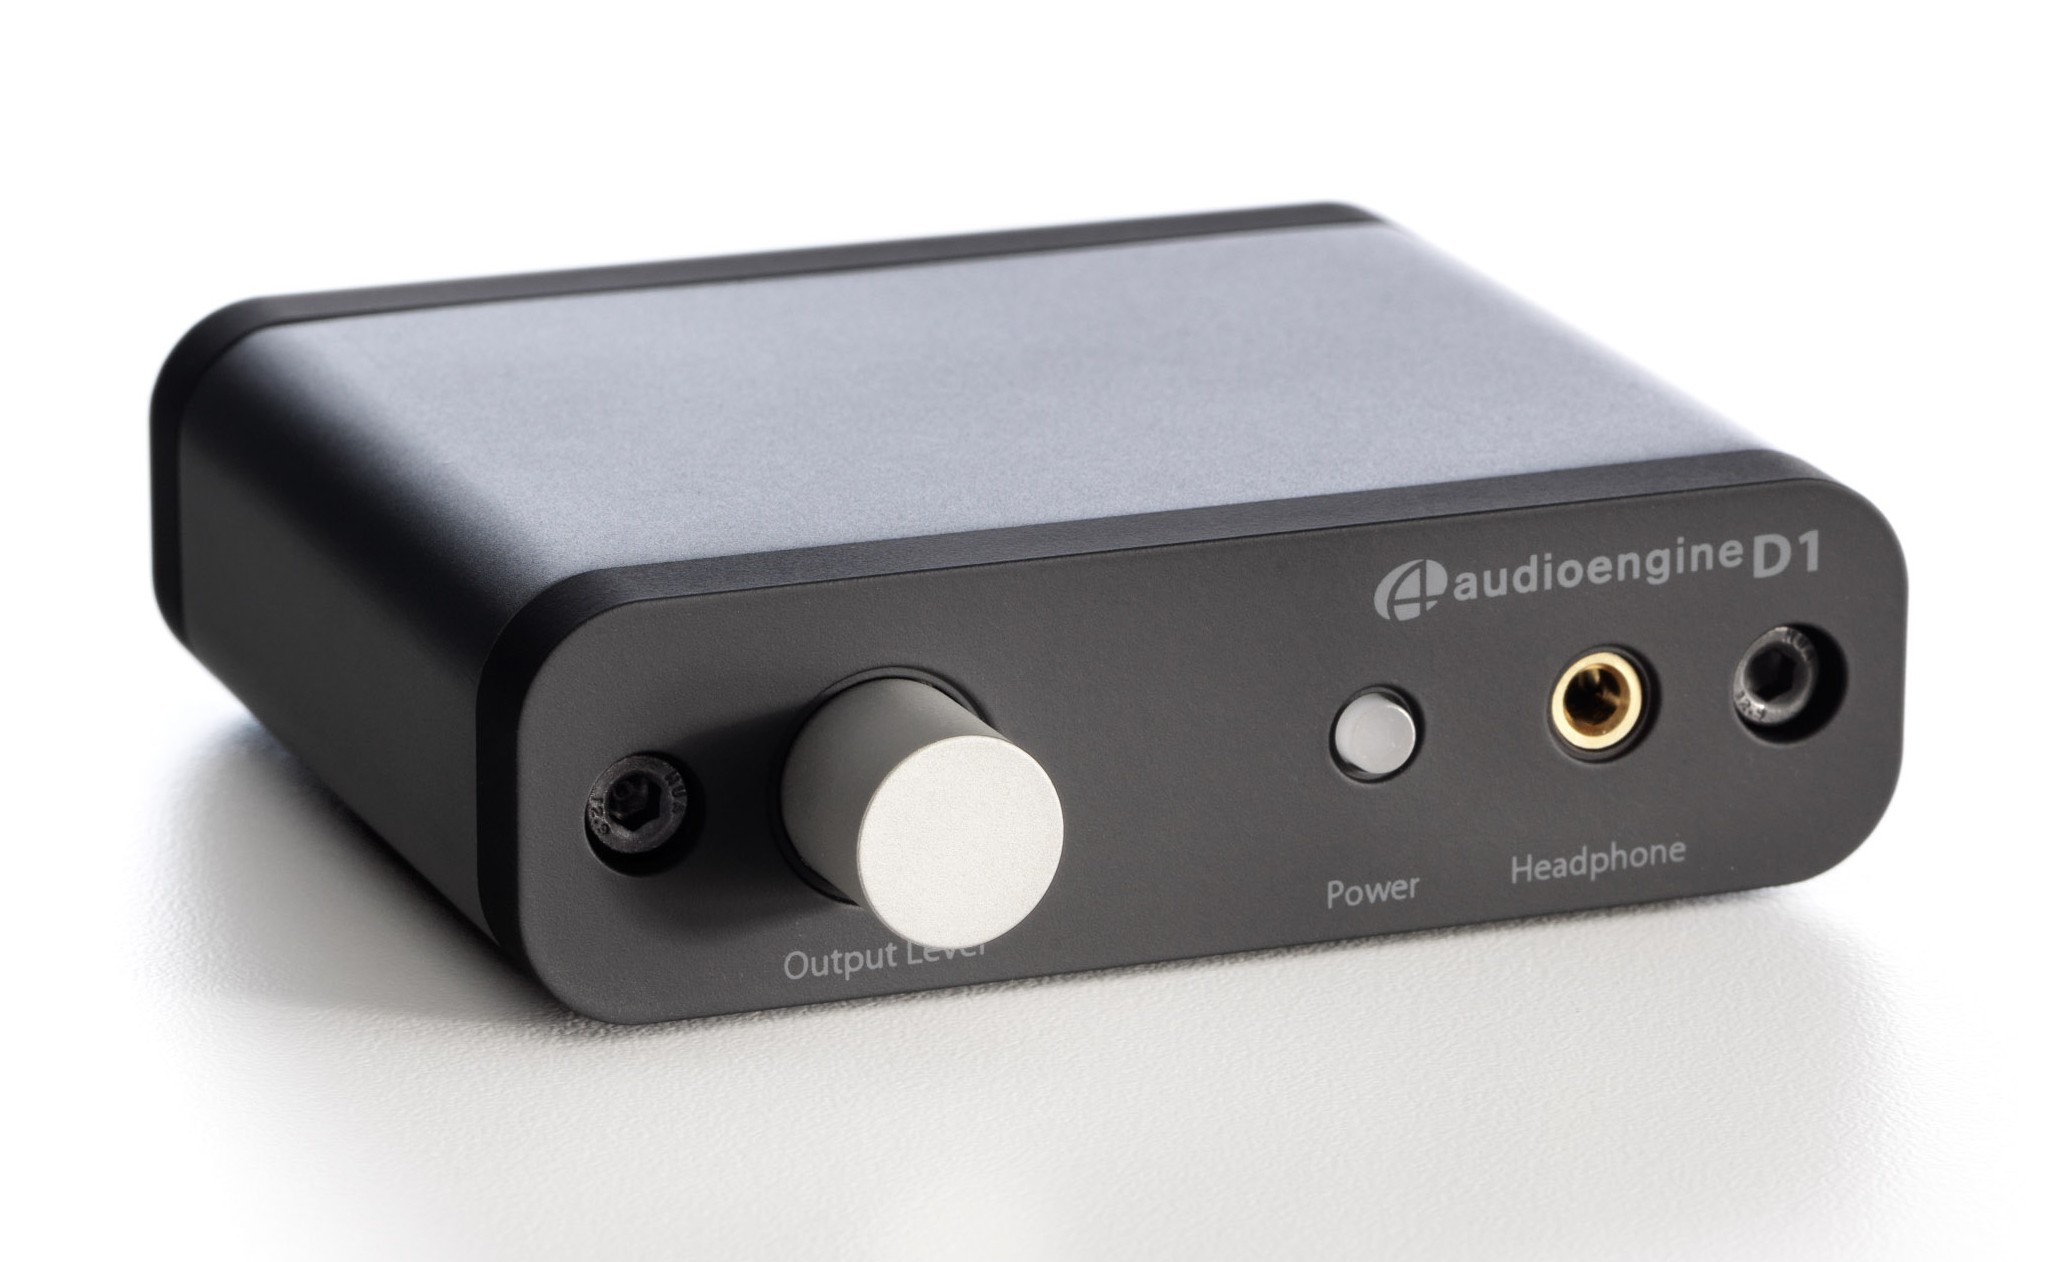
For many years, I tolerated the built-in audio support for my PC. I’m not sure why, as it’s often been the case that internal audio solutions have picked up audible hiss or interference. The Realtek solution in my Dell was no exception to this; it has all kinds of high frequency buzzing on its outputs that I don’t understand why I waited so long to get rid of. In any case, the thing that finally pushed me over the edge was getting a Das Keyboard mechnical keyboard a year ago; this meant I no longer had volume control buttons on the keyboard, which was pretty inconvenient while playing something like Starcraft. The Audioengine D1 was pretty pricey solution to this problem at $169, but I really wasn’t satisfied with the audio from my PC, and reviews on the D1 were great, so I decided to go ahead. I’m sure there were more economical solutions to the problem, and I don’t think the D1 really added $169 of value for me, but it did solve the problems I was dealing with. And had I waited, I would probably have gone with an even greater level of overkill.
Speaker Stands
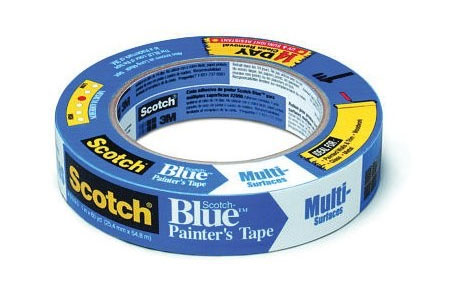
Truth be told, I was hoping for a little more improvement in audio quality with the D1. However, playing around a little, it was clear that speaker placement was the biggest issue. If I lowered my ears to desk level, things sounded much better. And indeed, recommended desktop speaker placement all recommended elevation so that speakers were at least on-axis with your ears, perhaps tilted upwards a little to avoid reflections off the desk. Sadly, the number of people who care about this is small enough that there were virtually no reasonable 4″ – 6″ desktop speaker stands; people either made their own or used stacks of CDs and the like. I opted to use a few spare rolls of painters tape as a temporary solution to at least get some clearance off the desk, and it definitely helped!
-
A few interesting photos
I meant to share a couple of photos that I found interesting. The first is of some waterdrops caught in the various spiderwebs we have around our house. Close up, they look somewhat surreal – it’s a real testament to the relative strength of the web that what look like huge globes of water are suspended by near-invisible threads:

The above was near the ground; our shrubs had one that looked more like the spray of a shower:

Like virtually all photos I post, you can click the above to enlarge to see more detail, if you’re interested.
The second picture is more one of those “I wish I brought my camera” moments. In my last post, I mentioned my 8-day effort to undo a bunch of recent weight gain. That involved a lot of walking, since walking doesn’t tend to leave you in a disabled state like an excess amount of other types of exercise can. Kirkland has many nice trails that make walking enjoyable if you have the time, and on one fine summer day, there was a great sunset – and an interesting glass sculpture to go along with it. Sadly, the only device I was carrying was my Galaxy Nexus – a great phone, but no better than average as a smartphone camera. The image I got kind of works at reduced web sizes – but totally fails to capture how nice the actual scene was when you try and view it much bigger.

The next day, I walked the same route but with the D800 this time. Regrettably, while it wasn’t overcast or anything, conditions completely paled in comparison to the day before. I might not even have stopped to take a shot if not for comparative purposes! Still, the ridiculous dynamic range of modern cameras helped capture much detail that was lost in the above shot:

A different angle:

It’s a shame the conditions the second day weren’t anywhere close the first day, but I guess you can never tell how things will turn out.
-
Product shown may not be actual size
Back in the spring, Valerie got the urge to add a number of fruit trees to our home – in spite of the substantial sum the prior owners of our home had spent on professional landscaping. On top of that, she was convinced that the last remaining Asian pear tree for sale was over on the far side of Seattle, and that we had to leave right now just in case someone else bought it first. But, she promised, the tree would rapidly bear lots of delicious fruit that would make it all worthwhile. I was somewhat suspicious, especially since Costco carries fairly nice Asian pears year round at a not-exorbitant price, but the non-mutual excitement level was already so high that there was only one way the story could go from here.
Well, sure enough, the tree wound up bearing fruit! And unlike the other trees and plants we have in our garden, the location of the Asian pear tree prevented the entire harvest from being lost to a mysterious combination of slugs, bugs, raccoons, rabbits, moles, birds, Leo, and who knows what else. Here’s a picture of one of the delightful fruits it produced:

Indeed, everything seems perfect until you put things in perspective a little:

Considering that the Asian pear tree is among the most successful plants in our garden, it’s safe to say that our weekly produce bill hasn’t been shrinking. But I am assured that trees need time, and that next year, things will be different :).
-
Internet Weight Loss Scams
It’s been an incredibly long time since my last post – not for lack of interesting things to share, but for a number of reasons. One of those was returning from Toronto with 700 photos – after aggressively deleting while in Toronto – to process. Another was being a little busier with work. But perhaps the most significant contributor was having realized, shortly after Valerie and the kids left for Toronto a week before I did, that I weighed way too much, and really needed to do something about it. So I decided, to start, that I should try and lose 8 pounds of actual weight (not just retained water) in the 8 days before heading to Toronto, attending family dinners and a wedding, and eating myself silly again.
Now, you occasionally hear that the maximum safe rate for losing weight is 1 or 2 pounds a week, but clearly that wasn’t going to cut it here. So, what to do other than turning to the Internet for a magic low-effort solution, right? OK, not so much; I’m not too prone to believing things that seem to be against the laws of physics or chemistry, so I did some planning with simple math; 8 pounds = 28,000 excess calories, so I’d have to burn on average 3,500 a day more than I was eating. Eating less than 1,500 calories a day would likely have triggered starvation responses from my body given the higher level of physical activity; at that level of intake and my current weight, I could count on losing 1,000 a day via food, which meant losing 2,500 more a day via exercise. Anything high intensity was out, as there’s no way I could sustain than for 8 days without my muscles quitting on me, so it’d just take 4-5 hours a day of medium intensity exercise. Realistically, even with moderate breaks, it’d probably take 6 hours a day. Ouch!
Fortunately, this realization happened just after the 4th of July, so I was able to use some of the generous time off work that Google provided to get a head start, knowing that once the work week resumed, it’d be nearly impossible to find the requisite time. While I did get a good portion of the necessary exercise from walking, the sun does set, and that meant needing to use exercise machines. Fortunately, we have a really nice setup in our basement that leaves no excuse for not exercising:

Unfortunately, I hate exercise machines. Spending an extended period on them feels like torture, that’s bearable in this setup only because of the entertainment system directly in front of the exercise equipment. I managed to go through almost the entire Fullmetal Alchemist anime series, not to mention some movies and a bunch of Starcraft 2 games on this 8-day quest. And this is where the “internet scam” part of the post comes in.
About a year and a half prior, the lamp on my projector had started getting dim after roughly 2,000 hours of service – so I replaced it. I just needed a model number LMP-H200 bulb, so I did what I always do – searched for one online, and ordered a replacement. This turned out to be much more complex than usual; places like Amazon didn’t carry them directly, but there were lots of 3rd-party sellers. I chose one with a decent online rating, got my lamp, installed it, and was good to go. Or so I thought.
As it turns out, the majority of projector lamps available online are essentially 3rd-party replacements. Yet for some reason I don’t understand, they all get away with calling themselves a “Sony LMP-H200”, even though they’re not made by Sony. In many cases, even when on sites with very high reseller ratings (4.5+ stars out of 5), it’s difficult to tell whether you’re buying an original or not. The only reliable indicator seems to be the price – the original Sony products are basically $300; the knock-offs start as low as $80, but get up into the $200’s. And unfortunately, there are so many knock-offs and so many knock-off vendors, that it’s hard to tell which might be a viable solution, and which replacements are total garbage. Some claim to use exactly the same Phillips bulb in a refurbished enclosure, others try and define seemingly arbitrary terms like OEM, OEM Compatible, Genuine Compatible, etc. But fragmentation is so high, and meaningful trustworthy user feedback so low, that it’s hit and miss.
Just search Amazon for “LMP-H200”, and sort by popularity – of the 10 most popular items, 4 have no rating, 4 have a single star, one has 1.5 stars, and one has 4 stars (with a single rating). I’ve never seen a product category with such universal dissatisfaction from customers, and I’m surprised Amazon even tolerates this. These ratings aren’t reflective of people discovering “hey, this isn’t genuine” – read the comments, and it’s reflective of the products not working – or in most cases, surviving a very short period of time.
So, as I’m several days away from my 8-day goal, on target in terms of actual weight loss, the replacement bulb I bought in ignorance burns out – after just ~420 hours out of a rated 2,000-3,000 hours (my original Sony bulb was over the 2,000 hour mark when I felt like it was getting dim). It was already painful to force myself to spend all that time suffering on the machines – what would I do now? Give up? Chromebook to the rescue!

I have one of the newer Samsung Series 5 550 Chromebooks from work, and it seemed just made to fit atop the elliptical machine in my time of need. It has great Netflix performance that somehow seemed to provide all the battery life I needed without even being plugged in! My usual disclaimer, I work on the Chrome team and I’m biased, but it really was a lifesaver in not giving up on my rather arbitrary and excessive goal.
With that temporary solution in place, I was able to finish the 8 days as planned, and lose the 8 pounds the math said I would (plus a little more that I attribute to temporary reductions in water levels), allowing me to go from an outright obese weight to something merely at the high end of being overweight. Yay! Then I got to Toronto, and faced this:

It’s amazing how much easier it is to eat 28,000 calories than it is to burn them!
Most of the information on projector bulbs I shared above was from my purchase the 2nd time around. Ironically, despite the risks involved, I still wound up buying the best non-original bulb I could find, in addition to an original bulb, simply because the original bulb was on indefinite back-order (it took more than a month to arrive). If you’re interested, I bought the original replacement from Adorama; it cost almost $300 and looks like this:

Given the performance of the first original bulb I had (that came with the projector), I strongly recommend sticking with originals and avoiding the knock-offs. But I’ll post again when my temporary knock-off dies; who knows, maybe I’ll get lucky this time. But probably not!
On the health front, I’m unlikely to do something as crazy again soon – unless I manage to balloon back up in size again – but even trying to make much slower progress towards a healthy weight requires a surprising amount of time. Especially when the kids triumph in their perpetual quest to avail themselves of junk food. So I’m hoping to work through a backlog of things that I had wanted to share – we’ll see how I do!
-
Ubiquitous Internet = better fireworks

I posted some 4th of July fireworks pictures on Google+, noting that I was pretty impressed that a relatively small town like Kirkland managed to put on a nice display out over the water. While you could see the bigger show going on in Seattle at a distance, what we got locally was pretty cool.
It’s been two and a half weeks since then, but I thought I’d follow up and share the rest of the pictures I took (via the slideshow/gallery link below), and mention how helpful ubiquitous Internet access was in learning the basics of how to even go about taking these shots. I don’t shoot much landscapes or scenery – our kids are my primary subject – and I don’t think I’ve ever left the house with a tripod before. But since the family, minus myself, went off to Toronto on the morning of July 4th, I had the opportunity to give it a try – plus Olivia had already started to say that she’d like to see the fireworks, even though she knew she was leaving that morning. Some of the basics – using longer exposures, keeping ISO relatively low – were sort of intuitively obvious. But at least one simple thing – using bulb mode to manually control the start and end of each exposure – helped greatly, but just isn’t something I would have thought of, since bulb mode just isn’t something I’ve really ever used. Another thing that clear in retrospect but that I didn’t figure out on my own is that like flash, the brightness of the fireworks themselves aren’t really affected by exposure time, so picking the right aperture (usually f/8 to f/11) is actually more important. One thing that’s kind of neat – shooting at base ISO and f/8 means a basic camera and kit lens would be perfectly sufficient!
So, thank you Galaxy Nexus + Chrome for Android + Google Search + experienced photographers who share freely + a lengthy wait for the fireworks to actually start – this first real attempt at this subject matter turned out much better than it would have otherwise (I say “real attempt” because I snapped some handheld shots on Canada Day a couple of years ago while holding a crying Olivia with the other hand).
(Slideshow which links to gallery below – won’t show up in RSS)
-
The bag I’ve been looking for
I’ve been really bad with posting consistency recently; I finally got to a backlog of things I had meant to mention a month ago, and haven’t posted anything since. Though like last time, that’s meant there’s a queue of things I’ve been meaning to share, after which I should really try and be more consistent!
The first thing I wanted to mention is a new camera/laptop bag I picked up. I already had quite an assortment of bags:
- Think Tank Digital Holster 40 – great for walking around with the D90/D7000 or D700/D800 with a single lens attached. I use this the most, but when traveling with more than one lens it’s not ideal.
- Lowepro Rezo 180AW – small/medium shoulder back that was great with the D90/D7000 and most DX lenses, but too small for the full frame stuff I use now.
- Lowepro Classified 250AW – huge shoulder bag that also takes a laptop. Great for transporting a bunch of equipment (camera + laptop) from A to B, but is too big to lug around during the day.
- Lowepro Flipside 300 – medium backpack that holds lots of photo stuff, but doesn’t provide quick access to your camera.
I’d tried quite a few different approaches to travel, but nothing really worked well. The Classified 250AW held everything I needed, but it was just too big; most airlines limit you to one carry-on bag (up to 9″ deep) and one personal item – a laptop bag, purse, briefcase, camera bag, or other such item (up to 6″ deep). The 250AW was well over the personal item depth – in fact, it was pretty much 9″ deep if you brought much stuff! Other configurations, like just bringing the holster and sticking my laptop/lenses in a regular rollaboard worked but weren’t great. Before a combined work/personal trip to New York back in May, I went looking for a solution to this issue, and decided to try out the Tamrac Rally 7 bag (aka Tamrac 3447). It’s been great!

It’s form factor is about as minimal as you can get when carrying a laptop + camera + lenses, and while it’s technically a tad over the 6″ limit, it looks and feels like a personal item and stows easily under airplane seats. Despite this, it holds a good amount of actual equipment; I just got back from Toronto, and packed it with the following:
- 15″ Macbook Pro (which fits easily but snugly)
- Nikon D800 with a 24/1.4 lens attached (the 24-70 2.8 would also fit)
- Nikon 70-200/2.8 lens (though this wouldn’t fit if attached to the camera)
- Nikon 50/1.4 lens
- Nikon SB-800 flash
- Chargers for both the camera and laptop, mouse, keys, wallet, etc.
The shot above is with all of the above in the bag; it’s a great fit for a configuration like that. With the top flap open, it looks like this:

It’s easy to pull out the camera whenever you need it, and having done several outings with the bag now, I’m pretty happy with the purchase – especially since it was just $90 on amazon.com, which is well below what I spent on the 250AW. The bag isn’t perfect, though; the following are things I wish were done better:
- The strap is non-replaceable and the plastic ring you see on the left constantly causes the strap itself to bunch up; there’s no freely rotating rings that allow you to straighten the strap out while on your shoulder.
- There’s a thin pouch (e.g. for a magazine) on the rear, but you can’t put a rollaboard handle through that area to walk securely with this bag atop a rollaboard.
- The top handle you see in the first picture is really dinky and isn’t suitable for lifting the bag if there’s anything in it.
Despite this, the bag works really well and I’m happy with the purchase!
-
Leadership vs. Management
Six years ago, when we our small company was being acquired, one of the acquiring execs asked what I guess is a fairly standard management question: what’s the difference between leadership and management? I don’t remember how I answered the question at the time, though I didn’t get sent to the basement to work on “special projects” by myself, so I probably came up with something within the boundaries of a normal answer. But now, I have a new answer.
This is Mommy, being managed by Olivia to produce a birthday cake for Leo:

Okay, it’s not the greatest looking, but that’s what going dairy-free does to a mousse cake! This is Daddy, being managed by Olivia to produce a birthday cake for Mommy:

I shared these pictures before in the Mommy Cake, Daddy Cake post. But a collaboration under Olivia’s management produced something even nicer for her birthday:

Each of these three cakes involved decreasing levels of micromanagement and direct involvement; quality seemed to increase as a result.
When it came time to make a cake for a belated birthday for Uncle Peter, Mommy decided that Olivia was finally ready to take a leadership role; she would not just supervise and direct an aging workforce bound into servitude – instead, she would lead, setting the artistic vision and inspiring others with her direct involvement in the project. The results speak for themselves:

Most answers to leadership vs. management seem to imply that leadership is what organizations need more of. I humbly submit that this isn’t always the case! Yes, those are M&Ms you see scattered in the cake. And there’s a hole through the whole middle of the cake, filled with the same custard you see in the abstract arrangement on top. It’s kind of like an exploded Boston Creme donut, in some ways.
Fortunately, Mommy had a secret backup plan that was a little yummier:

-
So Many Pixels!
I continue to be amazed by the resolution that the D800 offers, perhaps because this is enhanced by something I didn’t adequately appreciate in advance – autofocus capabilities that are a step above what the D7000 offered. The combination of these things allowed just walking up to a flower in my garden and taking this snapshot, with the 105mm f/2.8 VR:

There’s nothing great about the above as a macro shot, and if you’re into macro you can get far closer and more detailed. Having the leaf in the foreground obscuring things is distracting too, and perhaps I should have cropped that out. But to able to see this much detail in the world with no preparation, no tripod, and no lighting is new, at least for me. I had taken the random macro potshot in the past when the kids were being less interesting than insects, but a big camera at close range tends to convince most other lifeforms to fly away, and being off even a little with focus totally blows a macro shot. So I was kind of surprised by how easy it was to get something like the above.
Also, we went to Twanoh state park a bit over a week ago, since once a year they open up for anyone to come clam digging. We didn’t actually bring any clams home or eat them, but it was a fun activity for the kids. I was kind of amazed to see a seagull flying by carrying what appeared to be a whole clam in its mouth. It was kind of far away, and I only had the old 85mm f/1.8 AF on the camera, but I took a picture of it anyways. Unfortunately, 85mm really doesn’t provide very much reach:

But fortunately, 36MP provides the flexibility to crop… a lot:

I’m still glad I’m not into taking pictures of birds, as that’s one thing that seems even harder (and more expensive) than taking pictures of uncooperative offspring. I was just pretty impressed that the seagull was able to get such a large object into its mouth, and then to fly around with it!
While my PC is definitely feeling the strain of dealing with RAW files from my camera that weigh in at over 40MB each, I have to think that with the way that things are going in the display world, that all this resolution is going to help some day. My 5-year old 30″ monitor displays roughly 4 million pixels – 12 million camera dots – and feeding it with a 36 million dot image is overkill (camera pixels are not monitor pixels; there’s just one color value per “pixel”, not three). But with Apple creating attention around “retina” displays that pack a similar resolution into a 15″ display, and Viewsonic offering this 31.5″ 4K display (albeit at “about the price of a car”), it seems pretty clear that the detail that you may have to zoom in to see today will be baseline requirements for looking good on displays of the future.


